Represent your robot
I, robot
Setting up the robot description
Welcome to this first Overworld tutorial. As Overworld is a geometrical Situation Assessment component for Human-Robot Interaction, it is firstly centered around the robot itself. This is from the robot description that the robot will be able to perceive and thus reason about its world.
In robotics and especially with the use of ROS, a robot description is something really common and now quite standardized. We will thus avoid reinventing the wheel! We just have to make sure that everything is properly done from the robot side and then we will be able to create a first basic Overworld configuration.
Setup a tutorial package
To facilitate the tutorials, we will first create a ROS package that we will use for all the following tutorials. Let's call it overworld_tutorials. For the moment we do not define any dependencies as it will just contain some configuration files, ontologies, and launch files.
We can quickly clean the package.xml and CMakeLists files with their minimal content as follow:
Perfect, now compile your workspace to reference the newly created package.
Unified Robot Description Format (URDF)
The Unified Robot Description Format (URDF) is the most popular code-independent and human-readable way to describe the geometry of robots and their cells. Overworld thus uses it to get the robot model and dynamic.
We will not write one by ourselves as such files are usually provided. For this tutorial, we will play with Eve (from the Walle movie) which is really simple.
We will just publish the robot state and the joint state through ROS. To do so, let's create a launch folder in our package and in there create an eve_publisher.launch file with the following content.
The robot_description parameter is a ROS parameter containing the robot URDF file content. Overworld will use this parameter to load the URDF in the same way Rviz does it.
The joint_state_publisher_gui will open a little gui with slide bars allowing us to move our robot joints.
Finally, the robot_state_publisher just publishes the robot state to tf (I'm sure you didn't guess it). It takes the joint angles of the robot as input and publishes the 3D poses of the robot links, using a kinematic tree model of the robot.
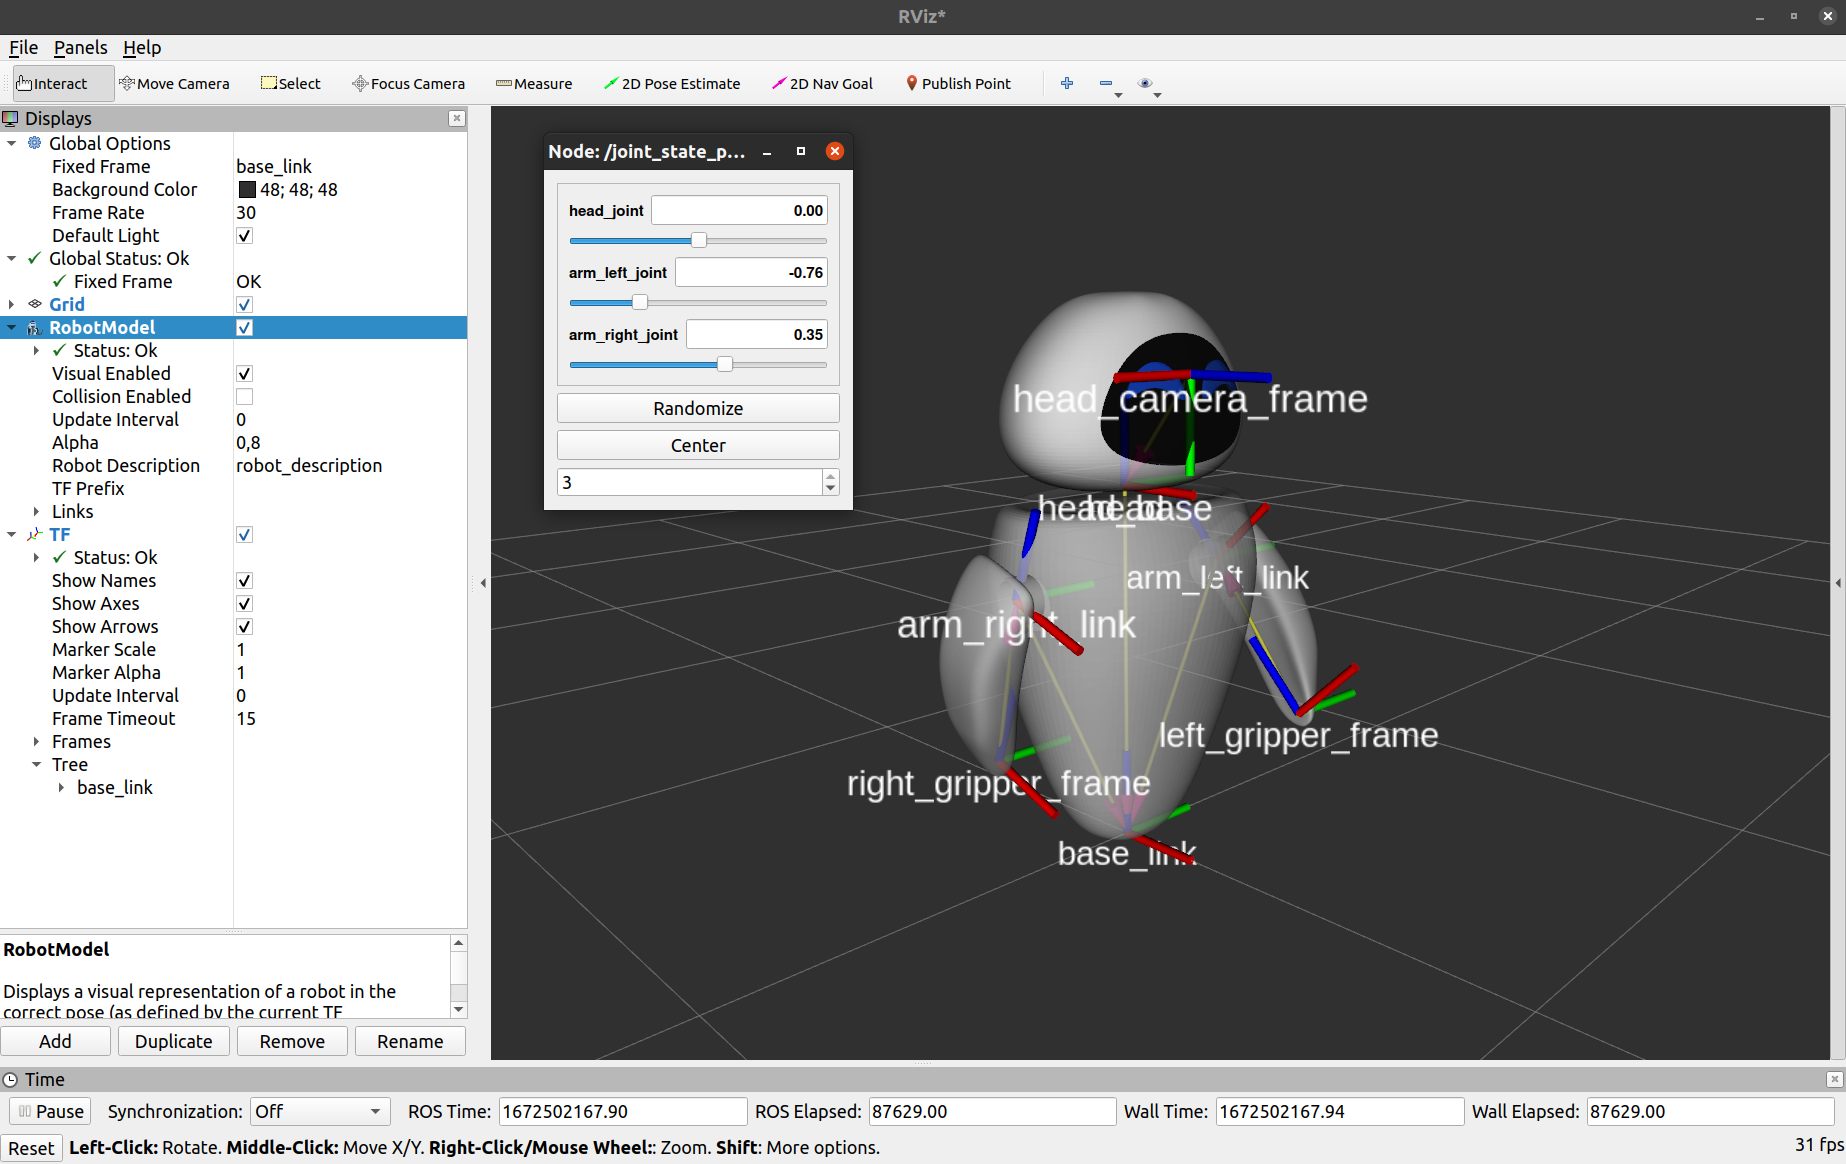
Before moving on, let's see what our robot looks like. To do so, launch our new launch file as well as rviz. In the latter, set the base_link frame as the fixed frame then add a RobotModel and a Tf visualizer. You should have something as below.

Playing with the sliders, you can move the robot's arms and head.
An important detail to be noticed, the robot has a camera frame whose forward axis is Z. For the moment, Overworld always assumes that the robot camera is built in such a way. This is important as Overworld uses this information to determine the robot's field of view.
Semantic description
Now that we have the geometry of our robot with its joints, its frames, and its meshes, we will describe it semantically to inform Overworld about the elements to consider.
To do so, we will use an ontology. The ontology is used by Overworld as a semantic knowledge base available to the entire architecture. In such a way, instead of creating many configuration files for each component, we rather use the ontology. One of the main advantages is that as it is available to all the components, we ensure to get a homogeneous configuration. Let's start by creating an ontologies folder in our package then create a new file called "agents.owl" with the following content.
Let's break down the content of this file. At the top, you first have the namespaces declaration. Here we can see that the namespace of this file is "agents" and that we will use the namespaces "cg_agents" and "cg_entities" for the concepts coming from the common_ground ontology. After the declaration of the other usual namespaces, we can see that our ontology imports the CG_agents ontology which is a subset of the common ground ontology. You can note that we do not import the CG_entities ontology as it is already imported by the CG_agents one.
The following is the description of the individuals of our ontology. It's there that we describe our robot. Here we start with the simplest description.
The three first individuals are our robot's body parts. We declare a base, a head and two hands. The names of these parts are in fact the robot's frames that we want to consider as specific body parts. For example, we state that the frame eve_head has to be considered as a head of an agent. Nevertheless, for each body part, we do not say to which agent they correspond. We do it in the agent description.
Our agent is the fith individual. We can see that its identifier is "eve", that it is a Robot, and that it is composed of four body parts, a base, a head and two hands.
To describe a robot, only a head and a base are required. For the hands, you can define, one, two, or none if you want.
Now that we have fully described our robot, we will be able to launch Overworld!
